Getting used to new applications can seem daunting. Although we’ve designed AssetAlly to be intuitive and user-friendly, we’d like to share a basic guide to getting started with AssetAlly to help make you and your team’s transition as easy as possible.
To begin:
Contact Ruekert & Mielke for your registration link.
Get in touch with your client manager at [email protected].
After you receive a link for registration from a member of our GIS staff, you will be prompted to provide a username, password, and some additional info in case we need to contact you.
Once we see your registration in the system we’ll add permissions and get you approved.
The portal page you will observe (once permissions have been granted), will look similar to the image below. This is the page that allows you to sign in and access all of your GIS resources.
Click the icon highlighted by the red mark-up below to enter your map viewer.
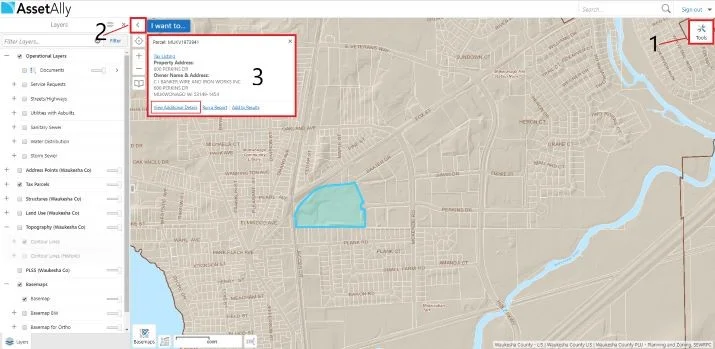
Once in your map, you can:
Expand your “Tools” to search or perform other actions.
Open/Close the Layer List to turn on or off various features you would like to see in the map.
Click on features within the map to get more details about them.
Additional information about navigating AssetAlly can be found in our articles section. Please feel free to browse prior posts, and do not hesitate to contact our staff with any questions.
If you would like to continue receiving updates on AssetAlly articles, just click on the button below to provide us with your e-mail!


